November! Its finally here and November means Iron Pour!

Pouring molten iron into a mold


Shortly after becoming involved in sculpture, I was introduced to metal casting. Metal casting is traditionally done with bronze, but at seven dollars a pound, bronze is a pretty expensive material to learn with. Since iron only costs around twenty-five cents a pound, many schools substitute iron for bronze. However, over the years iron casting has become much more popular for more reasons than just being a cheap alternative to bronze. Iron casters around the globe would agree and have proven that iron and iron pours can be much more valuable in so many ways.

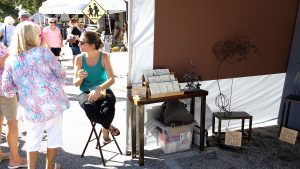
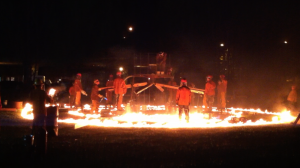
Because casting iron requires a group of people to work a long day, casters turn an iron pour into an event and invite other people to join — the more the merrier. Iron Pours have come to be a really fun social gathering for casters all around the world. Many artists even use the molten metal for performances because of the potential for spectacular reactions from the material. Again, the lower cost of the material makes it more available for experimentation.

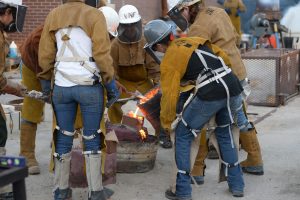
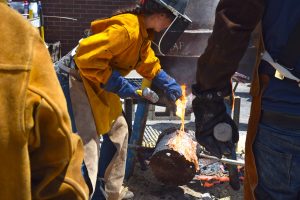
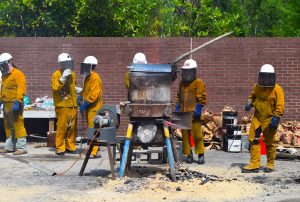
An iron pour usually lasts all day, and it requires hard work from a lot of people. The furnace takes a couple hours to prepare and to reach the right temperature; then it takes a few more hours to pour all the molds. If a performance is happening, many people will need to operate the furnace, and others will need to be available for the performance aspects. Afterwards, of course, it takes time to shut down the furnace and clean up the pour floor.

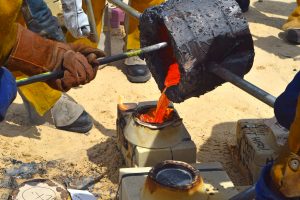
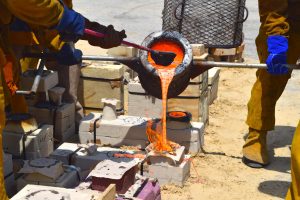
To melt iron, casters use a Cupolette furnace (a type of blast furnace) that is filled with coke (refined coal) and broken up pieces of iron. Discarded bathtubs and radiators are broken up into the appropriate size to fit the furnace. Iron has to get to a temperature of 2800 before it can be poured into the molds. When all the molds are safely poured and everyone has their pieces for their sculptures, it’s a great cause for celebration afterwards!

I’m looking forward to the iron pour this November at UNF for two main reasons. The biggest is to see friends and be working and involved with the community that I love. The other main reason is of course to come home with iron castings for some new sculptures that I’m working on!

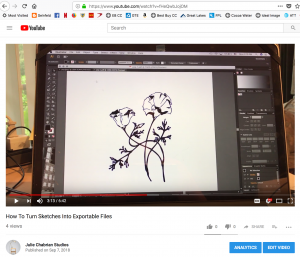
Stay tuned for the next article that will have more in-depth information about iron pours. Also, don’t forget to check out my YouTube channel in a couple days for videos of the pour!

Click the image to the right to learn the basics of a resin bonded sand mold ————>


Molten iron skimming


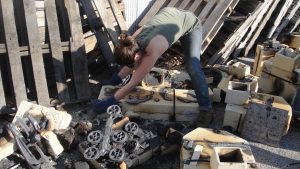
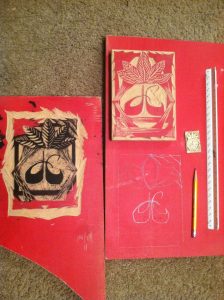
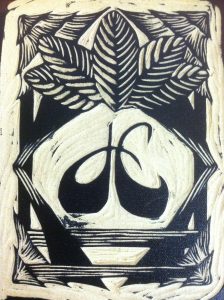
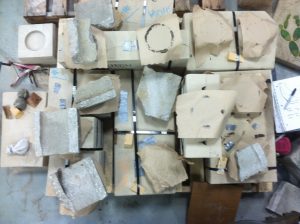
New on my  YouTube  page is a video that will quickly show you how a resin bonded sand mold for iron casting is laid out. In the video I use a cluster of fake grapes as an example of an item that you can cast.

Last weekend (Oct 21 – 22) was the first time I ever participated in an art fair. A local artist, who makes her living selling artwork at street fairs around the country, encouraged me to give it a try.

I was apprehensive about doing a street fair because a substantial fee is required to apply and again to reserve the booth when you are accepted. It simply meant that I would have to sell a sculpture to make my money back and I didn’t know how likely that would be at a street fair.

However, two things changed my mind. First, I saw a great way to promote my studio locally. Second, many art fairs are juried and award cash prizes. Also if you think about it, Miami Basel is essentially a giant street fair but on a much larger and fancier scale.


My friend offered a lot of advice on the type of shows to apply for, how to set up my booth, and what to expect when I get there. I also did a lot of research online and was lucky enough to purchase a really nice commercial tent from another friend of mine who has also made his living selling sculptures at art fairs.


After several months of planning, preparation, and construction I was ready to go. I had my tent with weights, custom color backdrops, my body of work including four large scale sculptures and a few small sculptures, three custom tables I built to display the small sculptures (also for sale), my Botanic’s Stationary Cards, and 100 business cards and 200 price sheets.


Saturday was great! I sold a piece, some stationary cards, and handed out lots of my promotional materials.

Sunday was not as great; the wind really picked up and I packed up my delicate pieces, which was a good portion of my work. I was really stressing out about the smaller pieces falling over and breaking. My stationary cards and promo materials were flying everywhere! The tent next to me hand a clothing rack fall over and take down a bystander! The weather was not making it easy. But it ended up calming down in the afternoon and I had the opportunity to talk to tons of fun people!

By the end of the weekend I had sold a few pieces, and handed out every last promotional piece of paper that I brought with me! I would say that was a success. So the moral of the story is that while daunting at first, the art fair was a chance to really exercise my sales skills, gain feedback from the public, and promote myself to my town! Thanks Cocoa Village!

Next up: 1NightR

November 2, 5:30-8:30

This is a gritty fun warehouse show with two other artist, Nancy Dillen and Susan Martin, in the Eau Gallie Arts District of Melbourne FL. Can’t Wait! Wish me luck!

YouTube Channel

How To Turn Sketches Into Exportable Files


The Julie Chabrian Studios YouTube channel has a new video on how to take a sketch and turn it into a vector graphic using Adobe Illustrator. This process digitizes your hand drawings and converts them into a file format which can be utilized for various 2-dimensional manufacturing processes, such as a laser engraver. The result allows you to manipulate and export your image in several different file extensions, like .pdf, .svgz, and .dxf.

First, a quick explanation of how I got into this. I started developing this process because I needed to figure out a way to “sign” my sculptures. If you are familiar with my work, you know that I work mainly in metal and my pieces generally do not have an obvious place to put a signature (although there are many forms of signatures one can find on a piece of artwork). Nor do my sculptures provide a convenient location for permanent placement.

To solve this dilemma, I decided to create a signature tag, similar to that commonly referred to by ceramicists as a “chop”. A Chop is a custom handmade stamp which a ceramicist uses to make an impression on their work, such as a symbol, initial, or some other detail that specifies who made it. You can also find it on the corner of some Japanese woodblock prints.


Above is an image of William Mueller’s chop on his ceramic pieces. The chop is a nicely designed combination of his initials, “W and M”.

Unfortunately for the sculptures that I already have made, there isn’t an easy way to alter their surfaces as in ceramics. So I am making an aluminum label which can easily be attached to difficult surfaces on the sculptures utilizing an epoxy adhesive. In the future I may do something else, but for now I’m going to have a shop laser engrave my design that includes my signature onto a piece of aluminum, and then permanently adhere it to my sculpture.

Now I will explain the process I used to digitize my hand drawings, so you can try at home too, if you have Adobe Illustrator.

I decided to use a woodblock design that I originally made for my surfboards, which has become my studio logo.

I already had made my surfboard logo into a vector graphic in Adobe Illustrator, so the last thing I had to do was add my signature.

Begin by making a few signatures on a piece of paper with a pencil until you find one you like. The next thing I did was make sure that the signature was relatively dark/thick and didn’t have any smudge lines or stray pencil marks. Go for smooth, sharp edges. Then place it on a scanner and scan it to your computer. Crop the image and save it at a relatively high dpi as a JPEG.

Next, open the JPEG in Adobe Illustrator, select the image and click “Image Trace” up at the top menu bar. There are a couple options under the “Image Trace” drop-down box, but I chose “Black-and-White Logo”. Once the program completes that action, click “Expand”. If you had sharp enough edges on your drawing, the program will have found them easily. Now your sketch is in outline form as if it was drawn with the pen tool. Pretty neat! From here you can edit or clean it up. Make sure to save it at this point. Select it and drag-and-drop where you want relative to your other designs on the logo.

Once I had all the elements of my logo together, I played around with a couple different design ideas. I moved and sized the three elements until I found a layout that I was happy with.

I had two different versions engraved, one with a horizontal orientation and one with a vertical orientation. This way I can accommodate different locations on my sculptures for the nicest fit.


I had two different versions engraved, one with a horizontal orientation and one with a vertical orientation. This way I can accommodate different locations on my sculptures for the nicest fit.